Turn Fabric Remnants Into Cushions: Easy DIY Guide
Turn fabric remnants into cushions and you solve two problems at once: the guilt of a fabric stash you can't throw out, and the cost of throw pillows that never quite match your room. Most scraps that feel too small for clothing are plenty big for a 16-inch or 18-inch pillow cover. The trick isn't sewing skill.
It's learning to read your fabric before you cut.
Here's the part most tutorials skip. Cushion covers need two panels roughly the same size, and remnants rarely cooperate. In our research of sewing guides and manufacturer specifications, the single biggest failure point is cutting before checking grain line and print direction.
Get that right and a scrap pile becomes a matched set. Get it wrong and you've wasted the fabric. What follows is a visual walk through the whole process, from sorting scraps to sewing the final seam.
turn fabric remnants into cushions
You can turn fabric remnants into cushions by cutting two matching panels that respect grain line and print direction. Check each scrap is at least one inch larger than your finished panel. Pre-wash, press, and piece smaller scraps into one big enough panel.
Then sew with a half-inch seam allowance. A standard 18-inch cushion needs about half a yard of 44-inch fabric.
The Remnants That Actually Work (And the Ones to Skip)
Not every scrap deserves a cushion. Some fabrics fight you the whole way. Others practically sew themselves.
Sorting before you cut saves hours of frustration.
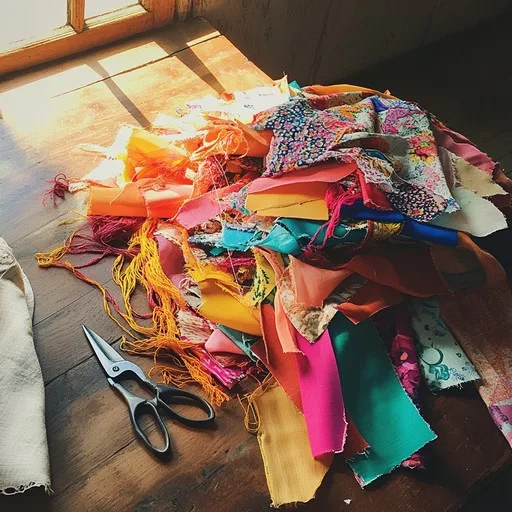
Image source: Bing (Web (fair-use with source credit))
Good candidates share a few traits. They're stable, medium-weight, and don't fray into oblivion the moment you look at them.
- Quilting cotton and cotton duck hold shape and press flat.
- Linen and linen blends drape nicely and take piping well.
- Upholstery offcuts (canvas, heavyweight cotton) make firm, durable cushions.
- Denim and old jeans are tough and forgiving for beginners.
Skip or handle with care. Some remnants cause more trouble than they're worth for a first cushion.
- Slippery silks and satins shift under the needle.
- Loosely woven fabrics fray badly and need a serger or French seams.
- Heavy velvet and chenille have a nap that must run the same direction on both panels.
- Anything with a large one-way print wastes fabric if the scrap is odd-shaped.
If you're unsure whether a scrap is big enough, measure it first. A finished 18-inch cushion needs two panels at least 19 inches square to allow a half-inch seam. If your scrap falls short, don't toss it.
The next section covers piecing.
Reading Your Fabric: Grain, Nap, and Print Direction
Grain, nap, and print direction decide whether your cushion looks handmade or homemade. Get them right and the panels hang evenly and match. Get them wrong and one side always looks slightly off, even if you can't say why.
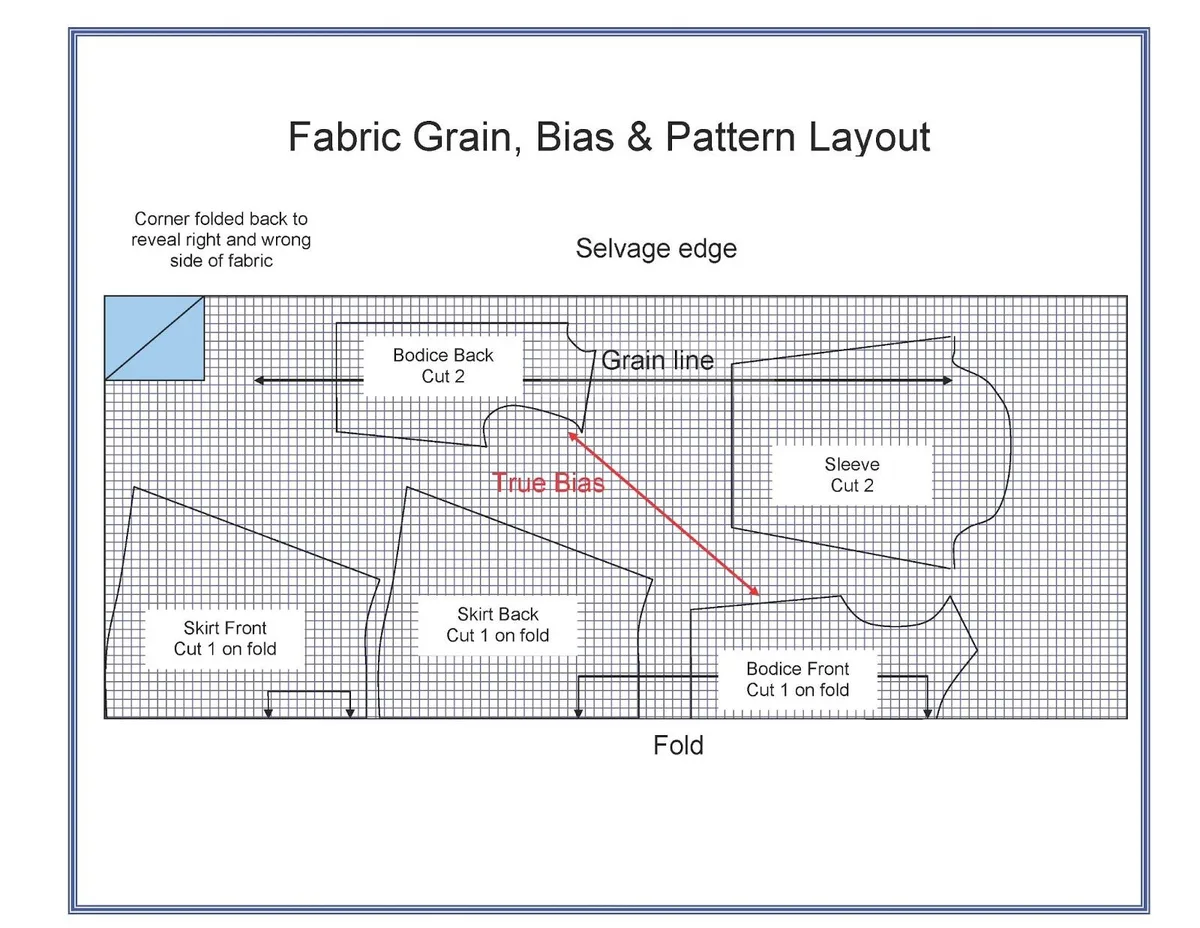
Image source: Bing (Web (fair-use with source credit))
Grain line is the direction of the threads woven into the fabric. The lengthwise grain runs parallel to the selvedge and stretches least. Cut your panels along it and the cushion keeps its shape.
Cut on the bias (diagonally) and the fabric stretches, sags, and puckers.
Nap is the surface direction on fabrics like velvet, corduroy, and chenille. Run your hand one way and it looks lighter. Run it the other way and it darkens.
Both panels must have nap running the same direction or they'll look like two different colors under light.
Directional prints have an obvious up and down: flowers, stripes, text, animals. If you cut one panel right way up and the other upside down, the cushion reads as a mistake the second someone picks it up.
Here's the if/then logic:
- If your fabric has a nap or one-way print, lay both panels out on the same table pass, all facing the same direction, before cutting a single piece.
- If you have limited fabric and a one-way print, plan for waste. One-way prints eat 15, 25% more yardage than allover prints.
- If you're using a scrap too small for two full panels, piece it. Join smaller cuts into one panel wide enough, then cut the matching panel from a plain or coordinating fabric.
Matching a print across two separate panels takes patience. Fold the fabric so the pattern lines up before you cut, and always add a little extra seam allowance so you can nudge the match when sewing.
Laying Out Pattern Pieces Around Awkward Scraps
This is where remnants get interesting. A rectangular cushion pattern won't always fit neatly on an L-shaped offcut. The goal is to squeeze two matching panels out of the fabric you have, not the fabric you wish you had.
Start with a paper template. Cut a square or rectangle in your finished size plus seam allowance (for an 18-inch cushion, that's a 19-inch square). Move the template around the scrap.
A diagram or photo would show the classic mistake: laying pieces straight across a scrap and leaving big unusable corners. Rotate the template to nest pieces and you'll often gain a whole extra panel.
If two full panels don't fit, you have options:
- Piece one panel. Join two or three smaller cuts into a single panel wide enough, then cut the second panel from the largest remaining piece.
- Go smaller. Drop from an 18-inch to a 16-inch cushion. Losing two inches often makes the difference between fitting and not.
- Go patchwork. Cut both panels from multiple smaller scraps in a deliberate color block or grid. This turns a limitation into a design choice.
A rotary cutter, self-healing mat, and quilting ruler make this stage faster and more accurate than scissors. The ruler keeps your lines square and the mat protects your table. For odd-shaped scraps, a clear ruler lets you see exactly where the fabric edge sits under the measurement marks.
One more practical tip: lay everything out completely before you cut anything. Once fabric is cut, it's cut. Double-checking the layout takes two minutes and saves a ruined remnant.
Step-by-Step: Sewing the Cushion Cover
Once your panels are cut and matched, the sewing is straightforward. Most beginner cushions take 1 to 3 hours from cut to stuffed.
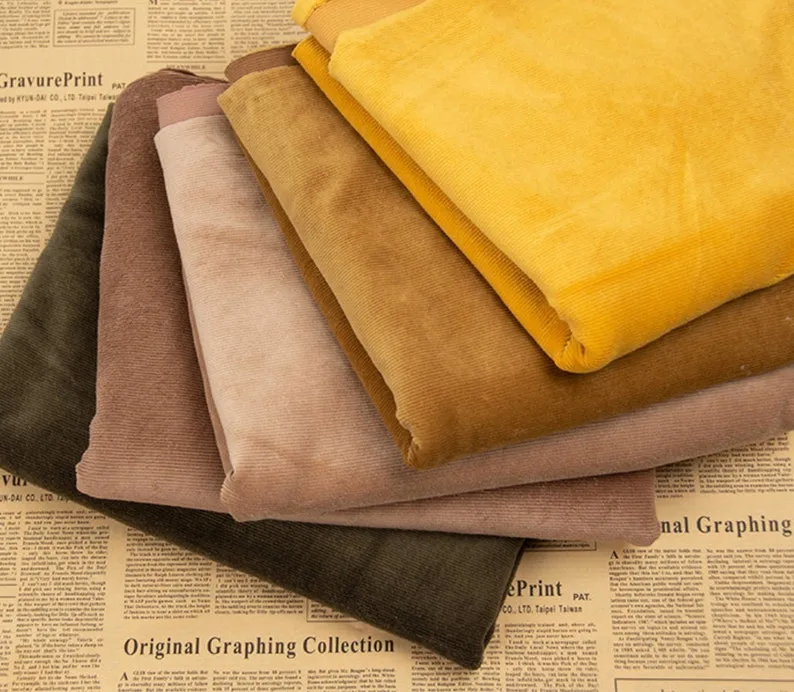
Image source: Bing (Web (fair-use with source credit))
Step 1: Pre-wash and press. Wash and dry your remnants the way you'll wash the finished cushion. This controls shrinkage. Press flat with an iron.
Step 2: Cut panels. Two matching panels, respecting grain, nap, and print direction.
Step 3: Choose your closure. Three options cover almost every project:
- Envelope closure: the easiest for beginners. No zipper, just overlapping back panels. Forgiving and fast.
- Zippered closure: cleanest finish and easiest to remove for washing. Needs a zipper foot.
- Button or tie closure: decorative and simple, best for lighter fabrics.
Step 4: Add piping or trim (optional). Baste piping to the right side of the front panel before joining. This is where a piping foot helps.
Step 5: Sew the panels. Place right sides together. Sew around the edge with a half-inch seam, leaving an opening for turning or inserting a zipper.
Step 6: Clip corners. Trim the seam allowance at the corners diagonally so they turn sharp. Don't cut through the stitching.
Step 7: Turn and press. Turn right side out, push out corners with a chopstick or point turner, and press the edges.
Step 8: Insert the form and close. Stuff the cushion insert, then close the opening with a ladder stitch or zip it shut.
Sizing, Inserts, and Getting the Plumpness Right
A cushion that looks flat and sad usually has the wrong insert, not bad sewing. The rule of thumb: the insert should be 1 to 2 inches larger than the finished cover. An 18-inch cover wants a 20-inch insert for a full, plump look.
Image source: Bing (Web (fair-use with source credit))
That extra inch or two is what fills out the corners. A same-size insert leaves the cushion looking deflated, especially after a few weeks of use.
Here's the fabric and sizing breakdown you'll actually use:
| Cushion size | Fabric per cushion (2 panels) | Recommended insert |
|---|---|---|
| 16" x 16" | ~1/2 yard of 44" fabric | 18" x 18" |
| 18" x 18" | ~1/2 yard of 44" fabric | 20" x 20" |
| 20" x 20" | ~5/8 yard of 44" fabric | 22" x 22" |
| 12" x 20" lumbar | ~1/2 yard of 44" fabric | 14" x 22" |
Fill choices matter too. Polyester fiberfill is affordable, washable, and hypoallergenic. Down and feather feel luxurious but trigger allergies for some people.
Memory foam and shredded foam hold shape well for seats and floor cushions. Buckwheat hulls give firm support but aren't soft enough for a throw pillow.
For a first project, a polyester fiberfill insert is the safest bet. It's cheap, easy to find, and forgiving. Upgrade to down or foam once you've got the process dialed in.
Visual Mistakes That Wreck a Cushion (And How to Spot Them Early)
Most cushion failures are visible before you sew the final seam. Catching them early saves fabric you can't replace.
Mismatched print direction is the most common error. Lay both panels side by side before sewing and check the pattern flows the same way on each. If a flower points up on one panel and sideways on the other, you'll only notice it once it's stuffed.
A photo would show this instantly. In print, it's the kind of flaw you feel before you see.
Nap running the wrong way shows up as a color shift. Velvet and corduroy look lighter when brushed one direction and darker the other. If your two panels read as different shades, flip one and recheck before stitching.
Wavy seams come from three causes: stretching the fabric as you feed it, a dull needle, or skipping the press. Press each seam as you go. Manufacturer specs confirm that pressing between steps, not at the end, is what keeps seams flat.
Puckered zippers usually mean the zipper foot was set too far from the teeth. Move the needle position and stitch closer. If the fabric still ripples, your zipper may be too short for the opening.
Fraying edges on loose weaves need a French seam or a serger finish. A basic zigzag over the raw edge also works in a pinch.
Corner bulges happen when you don't clip the seam allowance before turning. Clip diagonally at each corner, but stop short of the stitches.
Costs, Care, and Making These Last
A cushion made from remnants costs $3 to $12 if you already own the fabric. Buying everything new (fabric, insert, zipper, piping) runs $15 to $40. The savings come from the stash, not the sewing.
Time per cushion breaks down roughly like this:
- Envelope closure, beginner: 2 to 3 hours
- Zippered closure, beginner: 3 to 4 hours
- Any closure, experienced sewist: 45 to 90 minutes
Washing depends on the fabric and the insert. Removable covers in cotton or linen can go in a cold machine wash. Always check the care label requirements from the FTC if you sell cushions commercially.
Line dry or tumble low. Never wash down or feather inserts in a home machine.
Rotating cushions every few weeks keeps wear even. Sun fading and body weight both hit one side harder. Flip and swap them around the room.
Refreshing fiberfill takes minutes. Unzip the cover, pull out the insert, and fluff it by hand. If it's gone flat, add a handful of loose polyester fiberfill through a small opening in the insert seam.
Spot cleaning handles most daily marks. A damp cloth with mild detergent lifts coffee, food, and pet hair. Blot, don't rub.
Storage matters too. Store spare covers folded flat, not crammed. Creases press out, but stretched seams don't shrink back.
Frequently Asked Questions
How much fabric do I need for an 18-inch cushion?
You need about half a yard of 44-inch-wide fabric for an 18-inch cushion. That covers two 19-inch panels with seam allowance. If your fabric has a one-way print, add 15 to 25 percent for pattern matching waste.
Can I mix fabric weights in one cushion?
Yes, but match them for best results. A heavy canvas front with a lightweight cotton back will pull unevenly at the seams. If you mix weights, interface the lighter fabric so both panels behave the same way under the needle.
What's the easiest closure for a total beginner?
The envelope closure is the easiest. It uses overlapping back panels instead of a zipper. There's no hardware to install and no zipper foot required.
Sewing time drops by roughly an hour compared to a zippered finish.
Do I have to pre-wash remnants?
Yes, pre-wash anything you plan to wash later. Cotton and linen can shrink 3 to 5 percent on the first wash. Pre-washing controls shrinkage before you cut, so your finished cushion stays the size you intended.
Press flat before cutting.
How do I stop fiberfill from going lumpy?
Use an insert 1 to 2 inches larger than the cover and fluff it by hand every few months. Cheap fiberfill clumps faster than higher-loft polyester. If it's already lumpy, open the insert seam and add fresh loose fill to even it out.
Maintenance, Rotation, and Long-Term Care
A cushion that gets rotated and spot-cleaned lasts years longer than one that doesn't. Sun, weight, and moisture are the three things that wear them out fastest.
Rotate monthly if the cushion sits in direct sun. UV fades fabric unevenly, and the side facing the window always goes first. Swapping cushions between a sunny and shaded spot spreads the fade.
Vacuum weekly with a brush attachment on upholstery settings. This lifts dust and pet hair before it works into the weave. It also keeps fiberfill from compacting as fast.
Deep clean twice a year for removable covers. Cold wash, gentle cycle, mild detergent. Tumble low or line dry.
Press with a warm iron on the reverse if the fabric allows.
Check seams and zippers each time you wash. Loose threads and stressed zipper tape get worse with every cycle. A quick ladder stitch now saves a full resew later.
Refresh inserts rather than replacing them. A 20-inch polyester insert costs $8 to $15. Fluffing and topping up loose fill extends its life by a year or more.
Store out of season covers clean, dry, and folded flat. Damp fabric stored in a bin grows mildew. Mildew stains rarely come out of cotton or linen.

Similar Posts